It has a perpetual calender at the top, a write-on surface. cork message strips, memorabilia niche's, and bottom trays for coins, keys, etc.
Here is how to make it:
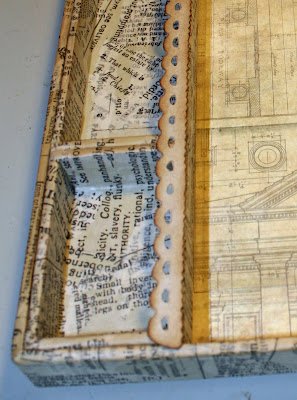
Remove all the configurable box inserts from the tray. You will need two 1 3/4" x 2 3/4" and a 1 3/4" x 5 1/2" box for the top row, three 1 3/4" x 1 3/4" and two 1 3/4" x 2 3/4" for the lower row and four 2 3/4" x 2 3/4" boxes for the lower trays. Glue boxes together in rows and cover with Ideology Tissue Wrap. Cover the edges of the tray as well.

To cover the boxes, tear the tissue into smallish pieces and apply with Ranger Glue and Seal. This stuff is great! Nice matte finish and it dries to a "dry" touch.....not sticky!

Trim and attach a sheet of scrapbook paper to the center of the tray.

Glue the upper row of boxes in place

For added security, attach the tray section with glue AND some brads to the bottom rail of the tray.

Glue the lower row in place just above the tray.

Add a punched or die cut strip to the bottom edge of the upper row to help hold the calender tickets in the compartments.

Add a piece of lightweight acrylic over the center paper. Add a punched or die cut strip to cover the attachment at the top and bottom.


Add cork strips to each side of the center section.

Add perpetual calender dates and other embellishments to match your theme.


To hang on the wall add Ideology Charm loops to the back upper edge with brads.
This would make a great gift....even for yourself!!
Check in tomorrow for a project to use the leftover boxes!
Laura
Products used:
Printer Tray, Tissue Wrap, Crowded Attic paper, Memo Pins, Hinge Clips, Charm Hangers, Long Brads, Grunge Paper by Tim Holtz Ideology
Vintage Lace Die by Sizzix Alterations
Flowers by Prima
Cork Strips from Office Depot
Butterfly Stickers by K and Company


holy cow, that is wonderful! Will give that a whirl after the holidays! Love it!
ReplyDeleteReally a cool idea and so useful and pretty too.
ReplyDeleteThanks for a great idea. Mary Werner
Thank you, Thank you, Thank you....this awesome message center is just what I'm going to make for my best friend. I've been going crazy trying to think of something for her....and then you create and generously share a tutorial.
ReplyDeleteI'm thinking my daughter could use one in her new apartment! of course I want one too (lol). I'm like a little kid this time of year...I can't wait to see what you come up with next....
This is just great!! I love it thanks for sharing with us :)
ReplyDeletePaula
Laura, I love this! Those ideology boxes are great aren't they. I just might have to make one for myself. C U Wed at noon.
ReplyDeleteThis is soooooooooooooo awesome LAura, and I just love this idea and is definitely going to make one of these for my new craftroom here, that´s for sure. It is just perfect for this here and I had just been wondering, what I should make to fit in here, and then you come up with this. It´s just so perfect and I LOVE this one here. Thanks so much for this wonderful idea.
ReplyDeleteWow! This is great! I am going to make some of these soon. You come up with the most awesome creations!
ReplyDeletePam
panutting at gmail dot com
Laura,
ReplyDeleteYou are Genius! I love the perpetual calendars, and this is such an awesome idea. Thanks so much for sharing your talent! Love it!
I LOVE this - watched the video last night and was stunned. Thanks for the close ups of the details today - this is on my January to-do list - thanks for the inspiration!
ReplyDeleteBTW - I pinned this on Pinterest!
ReplyDeleteI luv all the different projects you've made with the configuration boxes. I'm a local gal. Looking forward to taking one of your classes soon.
ReplyDeleteWow! This is beeeeeautiful!!! This is going on my to do list for sure!
ReplyDeleteThanks Laura!
You are simply amazing!!!!!
ReplyDeletewhere can I find the paper tray
ReplyDeleteseriously fantastic!!!!!!
ReplyDeleteLove this!!!
ReplyDeleteGeorgeous
ReplyDeleteLaura, are you going to show pictures of each tag from the christmas Bag of Tags?
ReplyDeleteLaura,
ReplyDeleteWhat did you use for for the days, months and date?? Is it a specific stamp??? I recently ordered the stuff to make this and I'm hoping to get it started in the next couple weeks!!!!
Thanks,
Kerri